A hydroponic tower is a vertical gardening system designed for cultivating plants without the use of soil. Instead, it relies on a nutrient-rich water solution that circulates through the tower, providing essential minerals and elements directly to the plant roots. Each tier of the tower typically contains pockets or slots for planting, allowing for efficient use of vertical space.
In my case, I 3D printed a hydroponic tower as a space-saving solution for my balcony garden. This innovative approach allows me to grow herbs like mint and basil vertically, optimizing limited space while providing a controlled environment for plant growth. The 3D-printed tower not only serves as a functional and compact gardening solution but also adds a touch of modernity to my balcony space.
Materials and electronics used
The materials used for constructing the tower are the following:
- 1 Kg of Green PETG;
- 2 Kg of Brown PETG (for printing around 5-6 modules);
- 1 Kg of White PETG (for printing the pot cover);
- 1 FEJO pot that you can buy in the nearest Ikea;
- 12 M3 Nuts and Bolts for assembling the 4 parts of the pot cover.
The electronics used are the following:
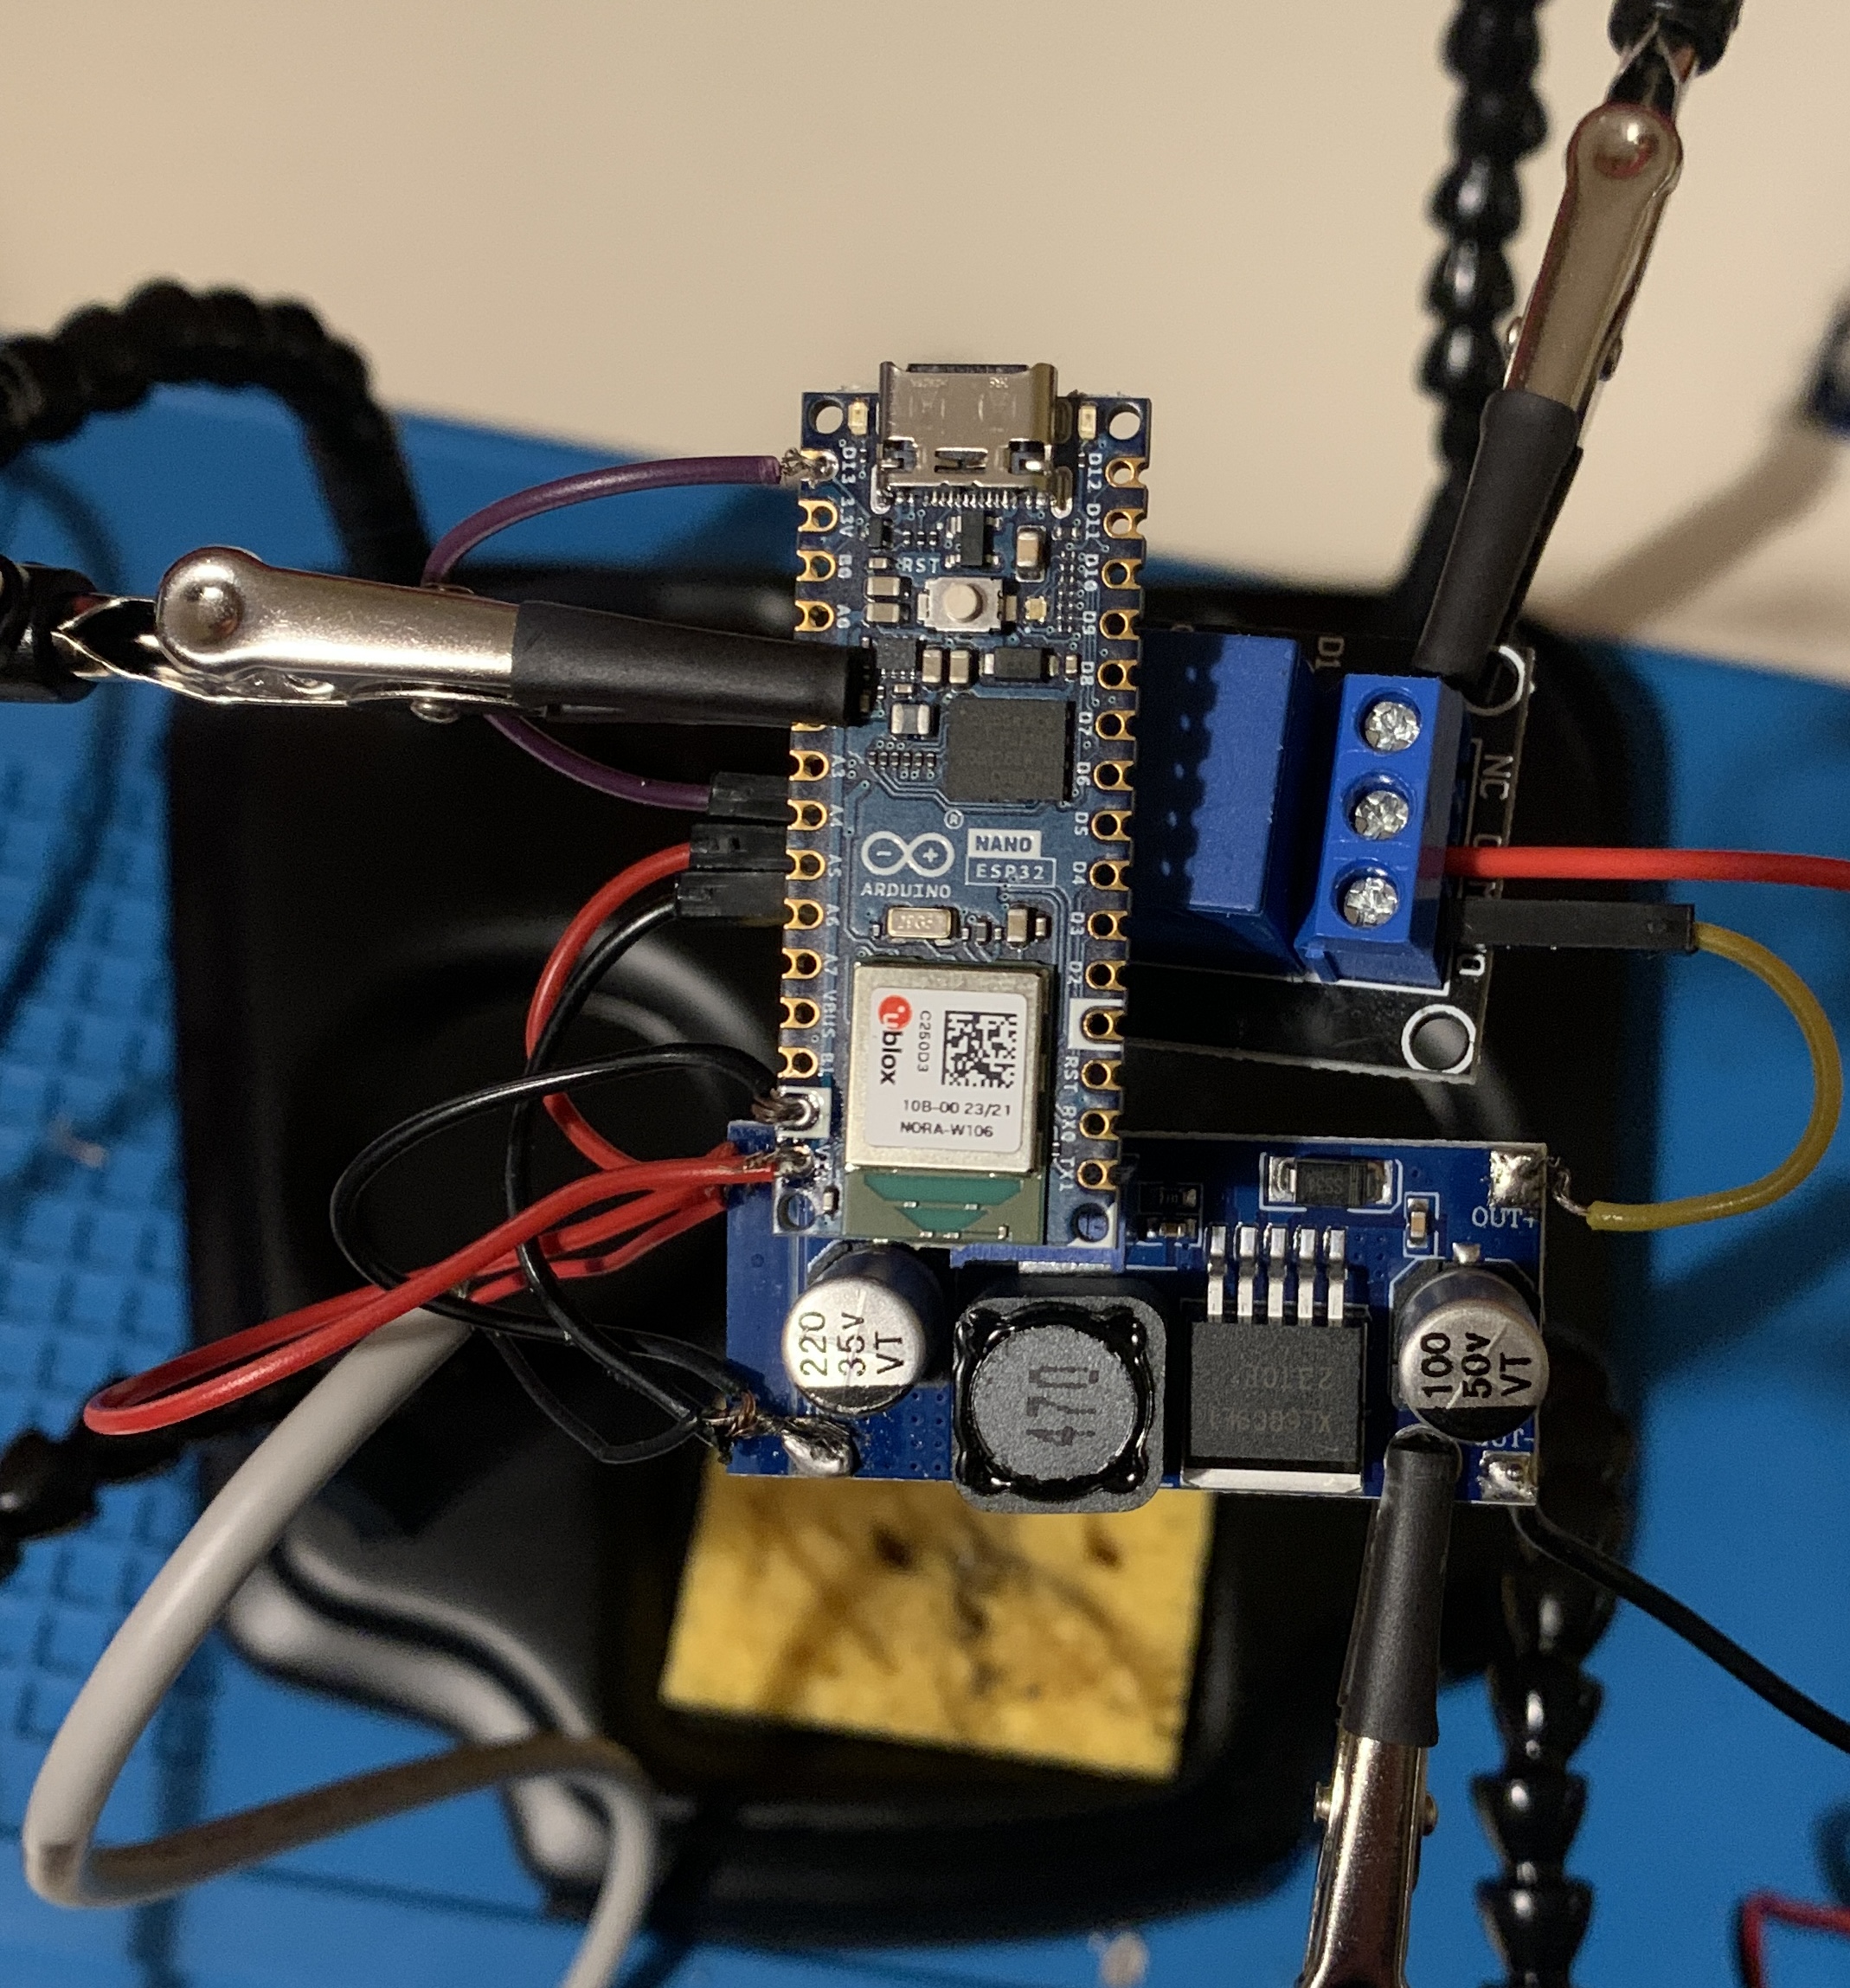
- 1 Arduino Nano ESP32 IoT;
- 1 RELE KY-019;
- 1 Step-up module;
- 1 12V water pump;
- 1 powerbank that supports low current devices like this one.
Assembly part
After having printed all the necessary parts and assembled the pot cover with M3 nuts and bolts, I assembled the tower just by stacking all the components one by one.
I have assembled the electronic components by soldering them together, following a straightforward electrical schematic.
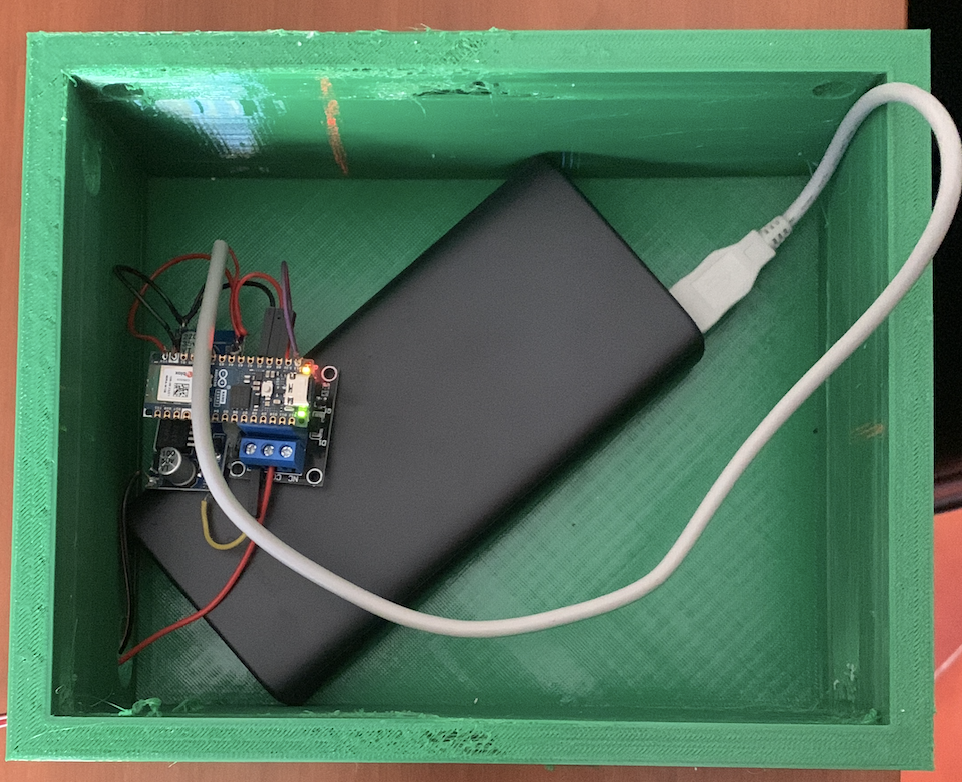
Then, I placed all the electronics inside a 3D-printed green box to protect them from sunlight, rain, and other environmental factors.
Programming the Arduino Nano ESP32 IoT
The code has the underlying concept that the Arduino activate for 5 minutes every 30 minutes. The specific pin for the relay, which determines where the command wire has been connected, is determined by the location where the device is sold.
            // Define the relay pin based on where the device is sold
            const int relayPin = YOUR_RELAY_PIN;

            void setup() {
              // Initialize the relay pin as an output
              pinMode(relayPin, OUTPUT);

              // Initial state: relay is off
              digitalWrite(relayPin, LOW);
            }

            void loop() {
              // Activate the relay for 5 minutes every 30 minutes
              digitalWrite(relayPin, HIGH);  // Turn on the relay
              delay(300000);  // 5 minutes in milliseconds
              digitalWrite(relayPin, LOW);   // Turn off the relay
              delay(1800000); // 25 minutes (30 minutes total) in milliseconds
            }
Final results
This video showcases the ultimate outcome, featuring the hydroponic tower operating:
Further improvements
In the near future I want to integrate sensors for measuring the pH of the water. This enhancement will provide more comprehensive monitoring capabilities, allowing me to adjust and optimize nutrient levels consistently, ensuring an optimal water environment for the plants.
Acknoledgemnts
I would like to express my gratitude to the YouTuber "overVolt" for inspiring this project. After watching one of his videos showcasing a similar version to mine, I found the motivation to embark on this project. If you're interested, I highly recommend checking out his video for valuable insights and inspiration.
I would also like to extend heartfelt thanks to my girlfriend, who played a crucial role in making this project possible. For my birthday, she generously gifted me the necessary electronics, laying the foundation for the realization of this project. Her support and thoughtful gesture have been instrumental in bringing this project to life.